


How to Dehydrate Greens at Home (Plus 13 Delicious Ways to Use Them)
From fridge overflow to flavorful pantry staples, this guide will help you turn extra greens into nutritious magic—without waste or stress

Thank you for reading The Plant Based Grandma!
If you’re enjoying the journey and want to support my work, consider becoming a paid subscriber. For $5 a month, you’ll receive my Plant Based Grandma Monthly Bundle—a cozy, heartfelt email filled with personal reflections, plant-based tips, and digital goodies made just for you.
Or, if you'd like to buy me a coffee, I’d be so grateful — half of all contributions go to the Rainforest Trust!
Have you ever opened your fridge to find leafy greens on the verge of wilting—and felt a little pang of guilt? That was me, more times than I’d like to admit. So, I dove into some research and discovered a solution that’s both simple and smart: dehydrating greens.
I had no experience with dehydrating foods before this, but what I learned amazed me. It’s a fantastic way to reduce waste, stretch your grocery budget, and keep nutrient-packed greens on hand long after their fresh counterparts fade.
In this article, I’m sharing everything I found—from the benefits and methods to 13 delicious ways you can use your homemade green powder or flakes.
Let’s learn together and turn those almost-forgotten greens into something you’ll be excited to sprinkle, stir, and savor!
This post may contain affiliate links. Full disclosure at the bottom.
Too Many Greens? Let’s Put Them to Good Use!
If you’ve ever opened your fridge and sighed at the pile of greens begging to be used, you’re not alone. I’ve had plenty of moments wondering how to keep spinach, kale, and chard from going bad before I figure out what to do with them. That’s why I got curious about dehydrating greens. It turns out, it’s a simple way to save them for later and still keep all that goodness.
Dehydrating greens is not only a way to reduce waste but also a convenient solution for preserving them. It helps you save space in your fridge and freezer, and most importantly, it preserves those vital nutrients. Once they’re dry, you can store them for months and effortlessly add a healthy boost to your meals.
In this guide, I’ll walk you through everything you need to know about dehydrating greens. We’ll talk about why it’s worth trying, how to do it at home with tools you already have, and the fun ways you can use those dried greens every day. From adding them to smoothies for a nutrient boost to using them as a crunchy topping for salads, the possibilities are endless.
Why Drying Greens Just Makes Sense
There’s something deeply satisfying about opening a jar of dried greens and realizing the potential they hold. Dehydrating greens locks in their nutrients, providing a versatile way to enjoy your harvest long after the fresh produce is gone. The creative possibilities are endless, from soups and stews to smoothies and sauces.
It’s also an excellent way to reduce waste. If you buy in bulk, get weekly CSA boxes, or have a garden that just won’t quit, this is for you. No more tossing wilted spinach or soggy kale. You can dry it all and use it later.
Plus, it saves precious freezer space. And when it’s time to cook, there’s no need for washing or chopping. Just sprinkle a bit into whatever you’re making and feel good knowing you added something healthy and homemade.
Pick, Prep, and Love Your Greens
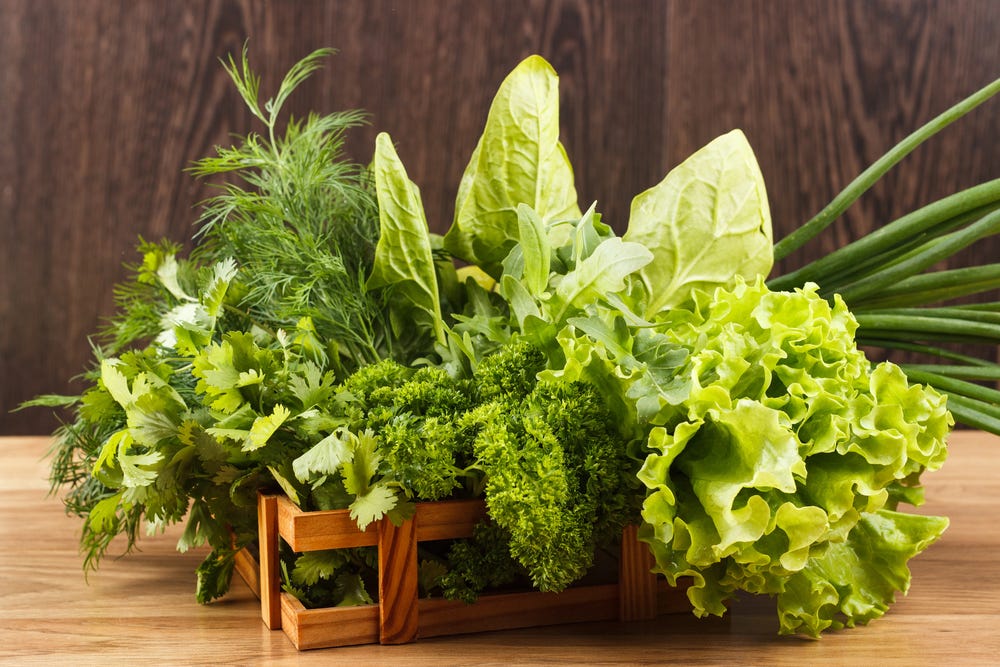
Not all greens are created equal when it comes to dehydrating greens. Some hold up better and taste richer once dried. Some of the best are kale, spinach, Swiss chard, beet greens, and collard greens. They’re all packed with nutrients and easy to work with.
Before you start drying, give your greens a good rinse. Soak them in a big bowl of cold water, then gently swish them around. After that, lay them out on a clean towel or use a salad spinner to thoroughly dry them. Any extra moisture can slow down the drying process or cause spoilage later.
For tougher greens, such as collards or thick kale, blanch them first to soften them. This means dipping them in boiling water for a quick minute, then cooling them in ice water. It softens the texture and can help them dry more evenly. Please note that some nutrients may break down slightly in the heat.
Four Easy Ways to Dehydrate Greens at Home
Dehydrating greens at home is easier than you might think. You don’t need fancy equipment (though it’s helpful), and there’s a method that works for just about everyone. I’ll walk you through four simple options so you can choose the one that best suits your kitchen. Spoiler: they all work great!
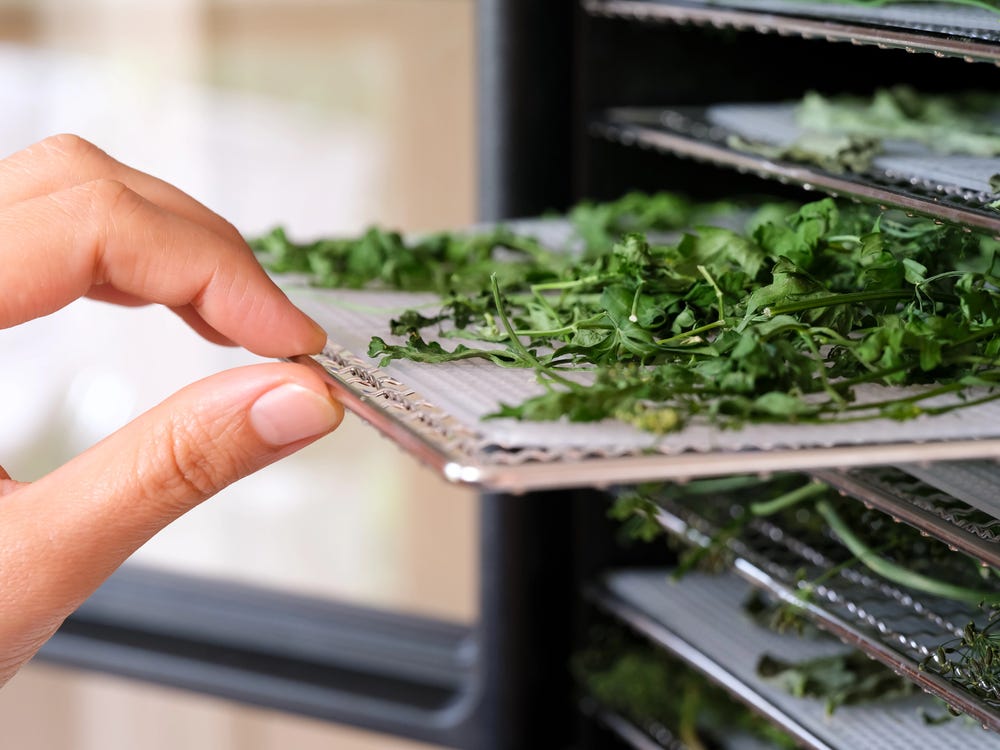
The Dehydrator Dream Team
If you have a food dehydrator, you’re in luck. This is the easiest and most reliable method for drying your greens. Start by laying your clean, dry leaves in a single layer on the trays. Set your dehydrator to 125°F to 135°F. Let them dry for 4 to 8 hours. Check on them around the 4-hour mark. The greens should feel crisp and crumble easily when they’re ready.
Air Fryer to the Rescue
For small batches, the air fryer with a dehydrating setting is a fantastic option. Lay your greens flat in a single layer. Use the lowest temperature your air fryer allows, usually around 120°F. Start with 1-hour sessions and check often to avoid burnt edges. This works quickly, so keep a close eye on it and shake the basket gently if needed.
The Good Old Oven Method
No dehydrator? No problem. Set your oven to the lowest temperature, usually around 170°F. Spread your greens on a baking sheet lined with parchment paper. Keep the oven door slightly ajar to allow moisture to escape. Check every 30 minutes. It usually takes 2 to 4 hours. Flip the leaves once during drying to help them crisp up evenly.
The Patient and Rustic Way
If you live in a dry climate or just love a slower pace, air drying can be a charming method. Tie small bundles of greens with string and hang them upside down in a well-ventilated room. Make sure they’re out of direct sunlight. This method takes several days, sometimes up to a week. Be patient and check daily for dryness or any signs of spoilage.
Keep It Crisp: Storing Your Greens the Smart Way
After you’ve finished dehydrating the greens, the next step is to store them correctly. You’ve done the hard work, so let’s make sure they stay fresh and full of goodness.
You can leave the dried leaves whole or crush them into flakes or a fine powder. Flakes are great for soups and stews, while powder is perfect for smoothies and sauces. Just make sure your greens are bone-dry before you crush them. If they bend or feel soft, they need a little more drying time. It’s crucial to ensure they are completely dry to prevent spoilage or the growth of mold.
Store your greens in airtight containers. I suggest using glass jars with tight-fitting lids. For extra freshness, you can add oxygen absorbers and tuck the jars into a dark pantry or cupboard. Light and moisture are the two biggest threats to keeping your greens fresh and shelf stable.
Now, about freezing—yes, you can absolutely freeze your dried greens if you want to keep them for a very long time. Use freezer-safe jars or heavy-duty resealable bags. Squeeze out as much air as possible before sealing. Label them with the date and store them toward the back of your freezer. They’ll keep for up to a year or more this way. Allow the jar to come to room temperature before opening to prevent any moisture from seeping in.
Sprinkle, Stir, and Sip: Easy Ways to Use Your Greens
One of the best aspects of dehydrating greens is how easily they can be used once they’re dry. A little goes a long way, and it’s an easy way to sneak more nutrients into your meals without significantly altering the flavor. Plus, it feels so good to grab a jar from the pantry and know you’re using something homemade.
Here are 13 easy and tasty ways to enjoy your dried greens every day:
Add a teaspoon of green powder to smoothies or fresh juices
Stir flakes into soups, stews, or chili for a rich, earthy boost
Mix into pasta sauces or tomato sauce while it simmers
Sprinkle into scrambled eggs, omelets, or tofu scrambles
Stir into casseroles for added fiber and color
Dust over popcorn with a bit of garlic powder for a savory snack
Sprinkle on roasted veggies before baking for extra flavor
Blend with garlic, onion powder, and herbs to make your own seasoning mix
Mix into salad dressings or dips for a sneaky green boost
Stir into mashed potatoes or cauliflower for a nutrient-rich twist
Sprinkle onto tacos or burritos just before serving
Add to savory muffins or pancake batters for color and nutrition
Mix into rice, couscous, or quinoa after cooking
From Garden to Jar: You’ve Got This!
Thank you very much for taking the time to speak with me. I hope you feel excited and confident about dehydrating greens at home. Even if you start with just a handful of spinach or a few leaves of kale, every small step counts. You’re learning how to waste less, save more, and nourish yourself with simple, thoughtful choices.
I would absolutely love to hear from you! Have you tried dehydrating greens before? Do you have a favorite way to use them? Leave a comment below, and let’s swap ideas. If you have any questions, please don’t hesitate to ask. I’m always happy to help.
And remember this: It’s one more way to make the most of what we have and nourish ourselves with ease and intention. You’re doing amazing things for your body, your kitchen, and your future. I’m so grateful to be on this journey with you.
©2025 Julene Cole, all rights reserved
You don’t need to be a homesteader or master chef to start dehydrating greens—you just need a little guidance and the willingness to try. Once you open a jar filled with your own dried greens, you’ll see just how easy and empowering it can be. From soups to smoothies, sauces to savory snacks, these leafy treasures are here to make plant-based living even more fun and flavorful.
I'd love to hear from you! Have you tried dehydrating greens at home? Got any creative uses I should try next? Leave a comment below and let’s swap ideas. And remember—every small choice adds up. You’re doing something wonderful for your health, your kitchen, and the planet. 💚
Expect Miracles!
Until next time,
Julene